Format
With only 450 points to construct our armies we would be playing 3 x 1:45hr games on each day. Although this was definitely made as more of a competitive tournament, there were a few interesting changes to the list submissions as well as the event setup itself.
First and foremost, the SBG Cup would be living up to its name, with a World Cup style composition where players were arranged into 4 groups of 4 for Day 1, playing every other member of their group. The placings achieved in your group would determine your position going into the Knockout Rounds of Day 2.
The Top 2 would be playing for all the glory in the namesake SBG Cup, whilst those who finished 3rd and 4th would be fighting it out for the Elven Shield and Dwarven Challenge Cup respectively. Overall I love this decision, both due to the intentionally low numbers for the event and because it made Day 2 exciting on every single table, with someone that had lost every game Day 1 being able to go on and win their respective division the next day!
Interestingly enough, every player also had to submit their army leader when purchasing their tickets. This meant Tioram released the groups for Day 1 well before list submission was required, allowing players to consider their matchups prior to the tournament itself taking place. Although I did like having a rough idea about what I would be facing, I’m not a massive fan of there being the opportunity for list tailoring to take place. Ultimately I’m certain that it didn’t take occur at all, but was still an interesting choice to begin with.
Finally, there was a return to the ‘old ways’, with no veto taking place as scenarios were secretly rolled from each of the 6 groups from the Matched Play Guide. Generally, I love the veto system as it adds another layer of tactical choice and flexibility. But at such a small points level I can understand how certain lists can simply veto a single option and feel very comfortable playing the other two (Think anything with a big killy leader removing To the Death in favour of Contest of Champions or Lords of Battle). So especially at smaller levels the lack of veto isn't too bad.
The List
Although I considered bringing a multitude of different lists, ultimately I had to fall back on the Dwimmerlaik and his mightless shenanigans, mostly due to the lack of time I had to paint. Seeing how well the list had largely held its own at its last outing at Triumph (go back and read the last tournament review if you haven't already!), I felt good about shaving down the list to 450 points and largely keeping all its strengths.
Based on the list's performance at 500pts, the main concession I knew I would be happy to give up would be the Warg Riders, who would be demoted to Wild Wargs to still ensure some speed in the list. On the other hand, the Spectres would need to remain in there as they ensured that heroes and warriors alike would be drawn into the clutches of the horde of orcs.After it all shook out the list come out pretty well:
Dwimmerlaik on Armoured Horse
4x Angmar Orc Warriors with Shield
4x Angmar Orc Warriors with Shield and Spear
1x Angmar Orc Warrior with Banner, Shield and Spear
Barrow Wight
3x Angmar Orc Warriors with Shield
3x Angmar Orc Warriors with Shield and Spear
1x Angmar Orc Warrior with Bow and Two-Handed Weapon
1x Wild Warg
1x Dead Marsh Spectre
Barrow Wight
3x Angmar Orc Warriors with Shield
3x Angmar Orc Warriors with Shield and Spear
1x Angmar Orc Warrior with Bow and Two-Handed Weapon
1x Wild Warg
1x Dead Marsh Spectre
Strategy
Overall the list will obviously play around the three heroes providing terror, and assassinating heroes. At 450 I would assume I likely always have the magical advantage (unless a Glorfindel or Elendil rocks up and just tanks everything), as well as the numbers to soak up the enemy and keep them away from all the important stuff. Obviously the lack of troop cavalry means no slowing down heroes on horses other than a Transfix or Paralyse so I’m assuming the Dwimmerlaik will be using far more Will on 2 dice Transfixes overall.
Looking at my group for Day 1, I was faced with my three opponents and their leaders:
First would be Dain Ironfoot. I assumed this would be accompanied by a Captain, and luckily their Master of Battle would be useless! Taking down Dain quickly would be the answer, as I was hopeful he would be sent in early to do damage, and killing him would remove the Fearless bubble he provided to the army.
Second would be a Troll Chieftain. Again, my assumption was that it would be run in the Black Gate Opens Legion, meaning the orcs would be wounding my troops very easily, and the Mouth of Sauron would likely be in support. Again though, I was hoping that the Fearless troll would be largely relied on for the damage output of the list, so I would prioritise taking it down and then dismantling the rest of the list with my Terror.
Finally we had the Witch King of Angmar. Although this could have been in a multitude of lists, I had just sold Liam a Barrow Wight model and thought he may want to bring it along! So I expected the two and of them and plenty of orcs, making for a grindy match between Courage 1 Orcs into Terror.
With that, it was off on the very long 30 second drive to the Dingley Scout Hall for the weekend!Day 1
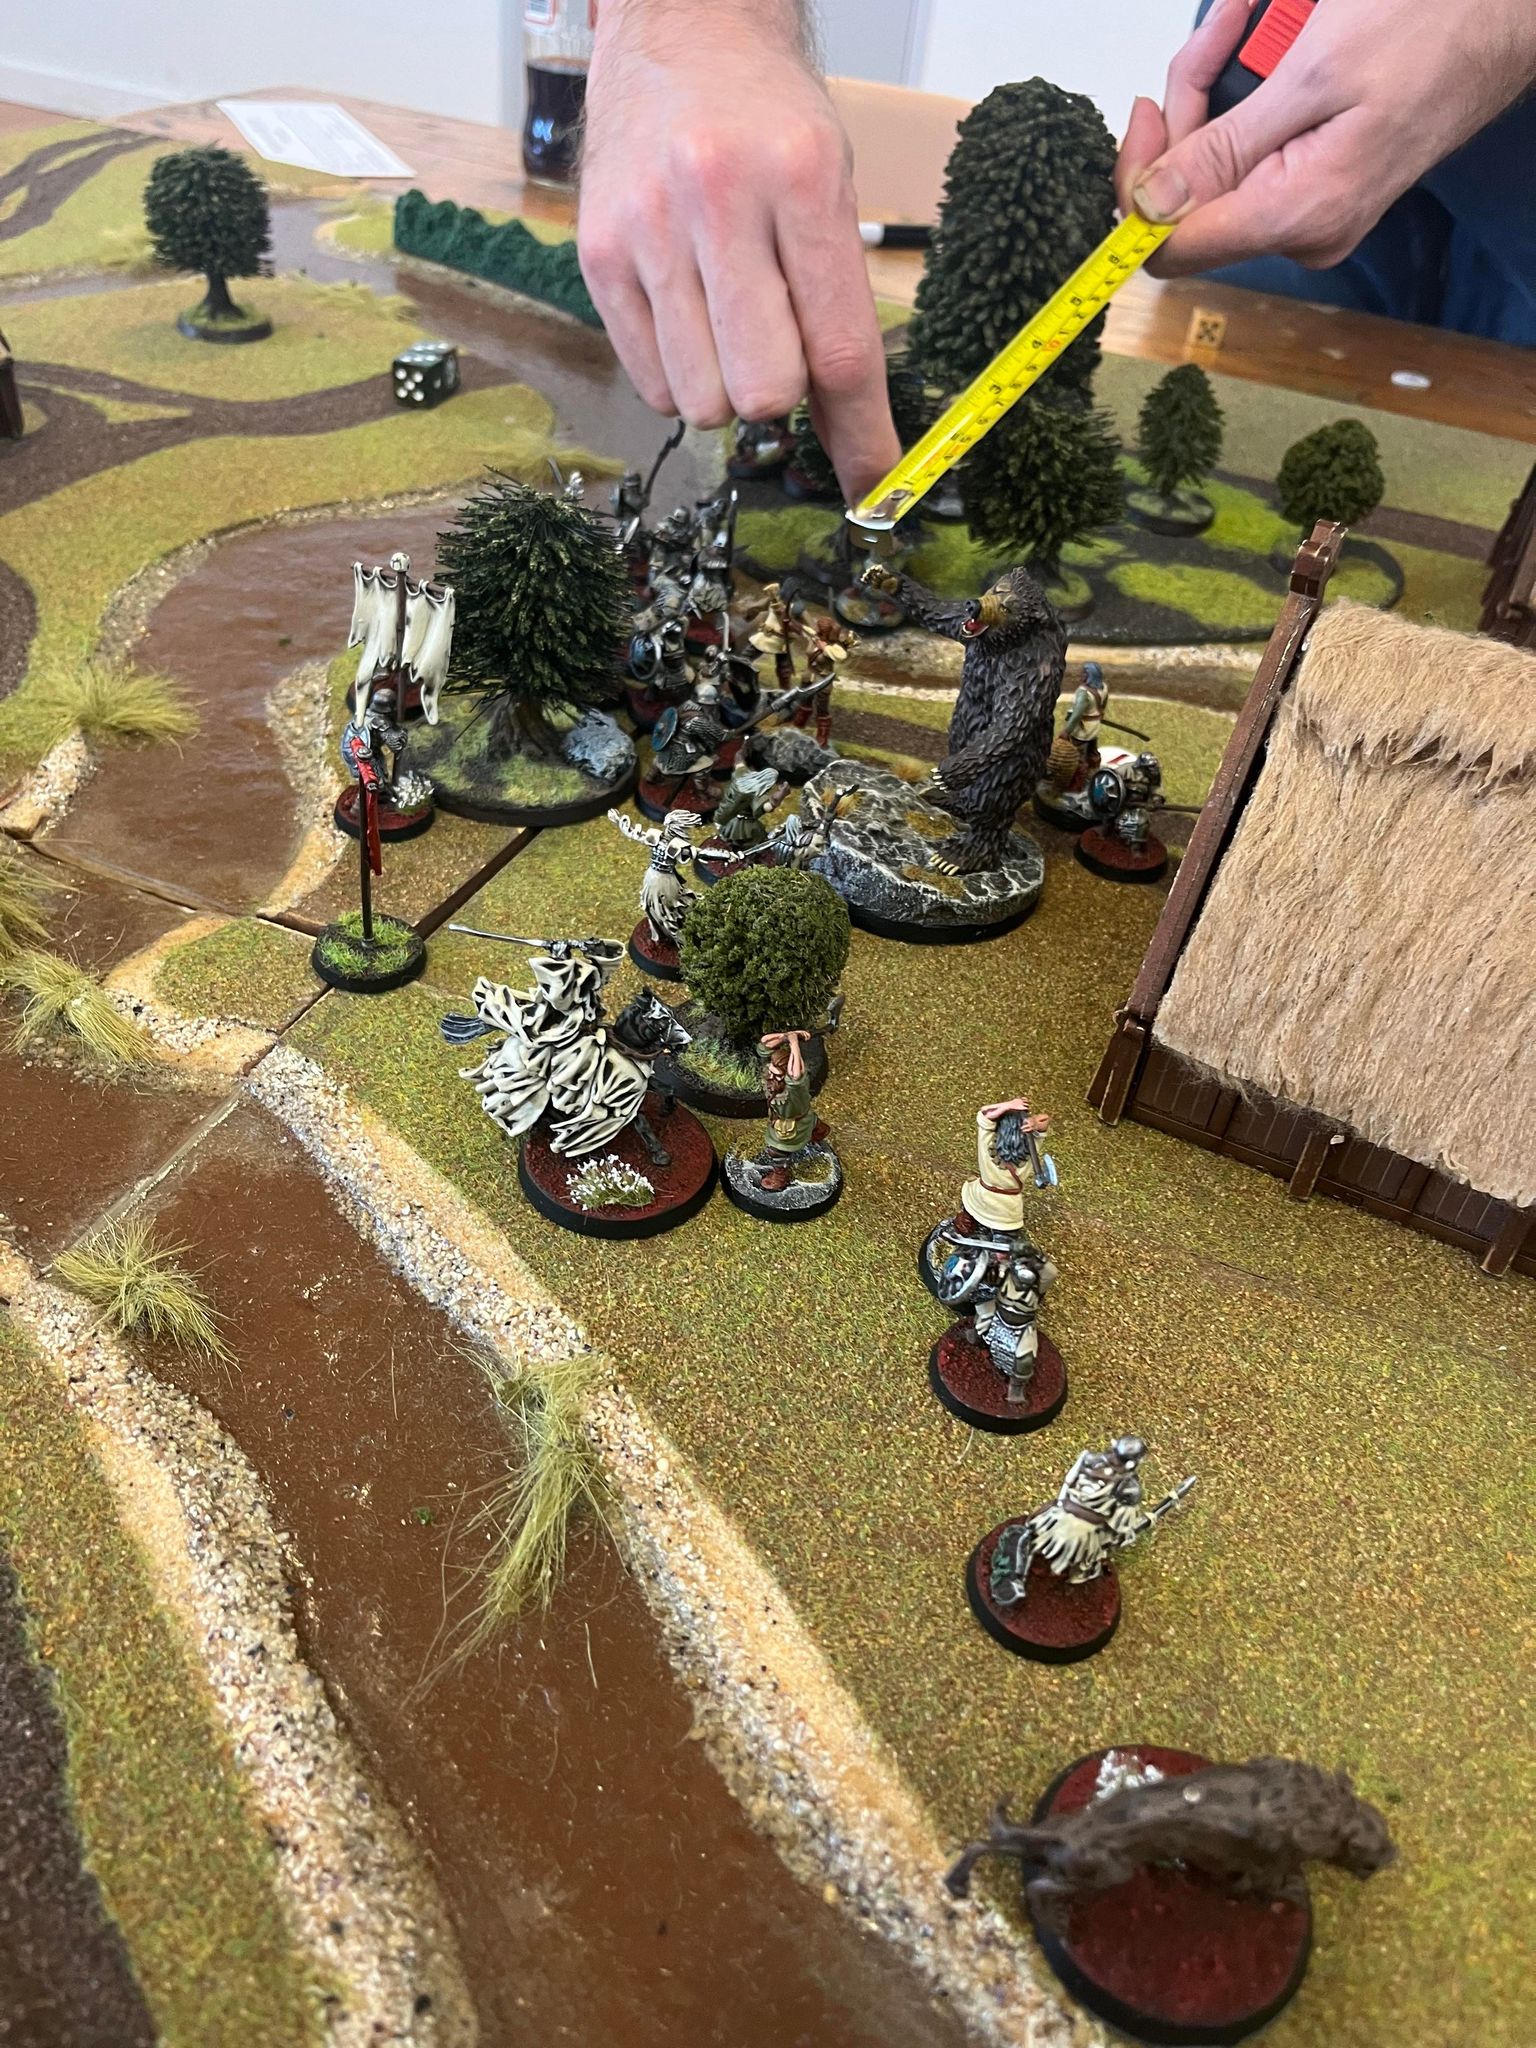
Game 1 BYE - Capture and Control vs Tim W’s Beornings
Unfortunately our day started off with some no shows, so it meant I would be guaranteed a win going into Round 2, but would still get to play Tim and his awesome Grimbeorn and Beornings in their frightening Legendary Legion instead of Dain. Although I had the fortune of not yet playing against them I had certainly heard horror stories from those who had their armies destroyed by them whilst the bears shrugged off lethal wounds and magic alike.
Tim’s List
Beornings LL
Grimbeorn
8x Beornings with Two-Handed Axe
4x Beornings with Great Bow
Luckily, Capture and Control was drawn for the game, and I was hopeful that I would be able to try and hold the majority of the objectives before either being broken or breaking Tim’s Defence 4 troops and ending the game. Tim started by deploying back on the objective in his own half, with Grimbeorn at the ready to transform out of the woods and barrel into my lines. Meanwhile, I deployed up on the centre line, looking to spread out quickly and confine Tim to his back third for as long as I could.

 |
| Holding 4 of the 5 objectives early on |
 |
| The lines about to clash |
As I walked in and seized Tim’s objective, his Beornings on their own flanking mission were successful in stealing the right objective over several turns, killing the Spectre and few Orcs I had sent in to delay them. Luckily Grimbeorn ran out of Might, being forced to call Heroic Moves over the previous turns to ensure his troops wouldn’t be surrounded and heavily outnumbered. My Orcs that didn’t have the option to pierce also began to stab, ensuring that either the Beornings they were facing would perish or they themselves would, thereby taking me closer and closer to breaking.
 |
| Whilst I snuck in to grab Tim's back objective... |
 |
| ...he was about to grab my right flank. |
 |
| The offending roll from Grimbeorn |
Despite my three spellcasters essentially having free reign to throw their spells at just the one target, apparently rolling higher than a 3 with our heroes was a tougher task than we expected as the Barrow Wights used ALL 10 WILL across 6 uses of Paralyse, but only managed to cast it once on a 4 and was quickly resisted by the hulking brute with his remaining Will coupled with his inherent Resistance to Magic.
Winning two priorities in a row, Tim was able to send his few flanking Beornings into the back of the lines, even going as far as to charge a badly exposed Dwimmerlaik the turn after I broke! Risking giving up a massive early lead to a possible draw or even loss, I was lucky that after winning the fight Tim decided to take down his horse and another Orc to set up for Grimbeorn to barge into them in the following turns rather than attempt a quick kill now. Unfortunately for Tim, although the first turn after breaking the game continued, it wouldn’t go further, as he rolled the necessary 1 to end the game before anything would befall the Ringwraith on the next turn.
 |
| The Dwimmerlaik under attack, and Grimbeorn not too far away |
Overall the plan basically worked, as there were several turns where I had held all 5 objectives and the majority of Tim’s force was locked into his own half. I probably overcommitted too many Orcs forward to swing into him on the left, as they were largely left behind as Tim started to force his way forwards. They would have been far more effective to stop the push on my right flank instead, as it was probably unlikely the Beornings would’ve pushed up the other flank away from their banner.
The lack of Paralyse going through was disappointing, but in the same vein Grimbeorn was uncharacteristically embarrassing the first few turns. In the end Tim played it as best as the list could do, and if the 1 or 2 hadn’t been rolled for a couple more turns I wouldn’t have been surprised if I had lost the middle objective at a minimum, and possibly my leader and another objective too. Luckily for us despite this we both walked away with a win via the Bye (although I did claim his Gym Badge) after a super fun game to start off the weekend.
MVP: Beornings. The stalwarts of the game, consistently charging the terror line and dealing massive damage. Also, there weren’t many other options since everything else was rolling like shit!
8-3 WIN (4 Objectives secured vs 1 Objective secured and Opponent Broken)
Game 2 Seize the Prize vs Nathan J’s Black Gate Opens Legendary Legion
Going into Round 2 I knew that the scenario would likely be very tough for me, as the two lists I would be coming up against had access to Heroic March (and the Might points I so desperately needed) so I would be on the back foot from the beginning. Luckily I came up against probably the more manageable of the two, with the powered-up Troll Chieftain and the Mouth of Sauron leading a throng of Morannons in the Black Gate Legendary Legion.
Nathan's List
Black Gate Opens LL
Troll Chieftain
10x Morannon Orcs with Shield
8x Morannon Orcs with Spear
The Mouth of Sauron with Armoured Horse
12x Morannon Orcs with Shield
7x Morannon Orcs with Spear
1x Morannon Orc with Banner, Spear and Shield
I expected that my opponent would easily grab the prize (or at least be in front of it) by using a Heroic March and Move early without me being able to do the same, and it would then be a matter of pushing through whilst trying to hold the target in place with magic (particularly difficult with a D6 shield wall and a massive troll in the way).
 |
| The sprint to the middle |
Nathan called the March on the first turn, but had left his Troll Chieftain just out of range of the Mouth of Sauron who was calling it, so whilst his right side advanced quickly around the Moria ruins and pits the Chieftain and his warband lumbered on directly towards the prize in the middle of the table, whilst my entire line just lurched forward their 6 inches (the Wild Wargs moving their full 10” on the flanks to be within 8” of the prize but also to serve as a possible bait if I was to lose priority. At the same time I threw a Drain Courage at the Troll Chieftain which was allowed to be cast without a resist (why would a Fearless monster need Courage anyway?).
The all-important turn two went to the forces of Angmar, with the Mouth of Sauron calling a Heroic Move and sending his warband crashing into the lone Warg and setting up a strong assault into my flank in the coming turns. Unfortunately this again was out of reach of the Troll Chieftain, giving me the ability to go ahead and grab the prize with a lowly orc on the first attempt. Yet the early advantage was quickly gone as the Chieftain called a Heroic Combat off of the bait Warg (pictured below) and into the prize-bearing Orc, killing him and wrestling the prize from his corpse.
Yet without a Might point remaining on the servant of Sauron, the Mouth was subsequently paralysed by a nearby Barrow Wight whilst the Dwimmerlaik hung around in the vicinity, limiting the hero to only two dice to resist. He then fell off his horse and was quickly dispatched by two orcs as they brought their piercing and two-handed weapons to bear.
 |
| The Orcs of Angmar took the early advantage killing the Mouth, but the Troll Chieftain was soon to join in |
After seeing the destructive power of the Barrow Wights on display, Nathan did the best option: running his Troll Chieftain back to ensure I didn’t get my hands on him for at least a few more turns as the Morannons formed a near impenetrable wall between my forces and the all-important prize. Seeing that, I began flinging Orcs around the sides of Nathan’s line, forcing him to send Morannons away to deal with the threat of being surrounded and hopefully thinning out his line slightly.
 |
| A brave Warg taking out multiple Morannon Orcs before perishing himself (and some Orcs fighting in what we later discovered was a pit and not water) |
Fortunately with some well worked use of the Fell Lights from the Spectres a sizable hole was formed in Nathan’s line, and it allowed the Dwimmerlaik, a Barrow Wight and a few Orcs to throw themselves into the massive hitter. On the way in I threw another Drain Courage at the troll which he was unable to resist, all out of Will in the failed attempts to prevent being Paralysed. Here the Drain Courage came to fruition, as between the S4 Dwimmerlaik with +1 to wound and 4 attacks and the Barrow Wight having 2 attacks wounding on 3s (due to the troll dropping to courage 1 from the Drain Courage’s and Harbinger of Evil vs Blades of the Dead), the Troll Chieftain was cut into pieces, letting the Nazgul take back the prize for the forces of Angmar.
 |
| The lines were well and truly broken, with the Spirits killing the Troll Chieftain and seizing the Prize |
With last turn being called I just had to hold onto the Prize and get the break on my opponent to guarantee the win. Luckily I won priority and sent the Barrow Wight and plenty of Orcs into advantageous combats, hoping Nathan wouldn't roll high enough on his courage tests to get through. With that I managed to pick up the final kills necessary to break the forces of Mordor, whilst screening off the Dwimmerlaik from giving up points from being killed or losing the Prize. Meanwhile, the Morannons were awfully close to breaking me in the end, getting 6 out of the 8 needed in the last turn, showing off the strength of the Legion.
For what was frankly a very elongated and brutal game, Nathan was an excellent sport, especially when having to deal with picking up his two most expensive heroes, the loss of his leader also signifying the likely loss of the game on the whole. For what was a scenario I was quite sure would be a massive uphill battle I was glad to pick up the win, although I believe this was one of Nathan’s first tournaments, so I felt a bit bad about him having to deal with such a terrifying (pardon the pun) list that usually uses much less points to take many more points off the board.
Somewhat fortunately for me the Maelstrom scenarios were drawn next, meaning likely one of the worst scenarios for my list wouldn’t be played in the Knockout Stage on Day 2. Here the Angmar mirror-match would take place, with Liam bringing the Witch King and Barrow Wight as expected, but along with the Tainted for good measure! It would quickly become a question of whether my magic would be able to crack through Liam’s larger stores, while my superior numbers got to work against his limited numbers, or whether I would simply be ganked from the outset by the opposing Wraiths.
Unluckily I won the initial priority and also rolled poorly on both my Barrow Wights to come on, being placed in the middle of the eastern and southern board edges respectively, whilst the Dwimmerlaik refused to arrive at all! However, things didn't fare much better for Liam, with the Tainted only rolling a 2 and not wanting to use the Might point to delay his arrival, so he was placed as far away from my warbands as possible. Although the Witch King did arrive on a 4, he had no troops in his warband, so was placed in the North to threaten the closest Barrow Wight early without properly endangering himself. His Barrow Wight must have been lost with the Dwimmerlaik, as he too didn't arrive on turn 1.
Liam won Turn 2, and his Barrow Wight rolled a 2! With the decision of giving myself more time to spread out or potentially taking out a full warband I went with the latter, making them deploy directly behind my eastern warband, which was soon joined by the Dwimmerlaik directly beside them! A two dice Paralyse coupled with Sap Fortitude meant the Barrow Wight went down with no Will left in its stores, although it would still provide terror to the Orcs surrounding him.
Liam's List
Angmar
The Witch king of Angmar with Horse and Crown of Morgul, 3/15/3
Barrow Wight
4x Orc Warriors with Shield
3x Orc Warriors with Spear
3x Orc Warriors with Bow
1x Orc with Two-Handed Weapon
The Tainted with Horse
4x Orc Warriors with Shield
3x Orc Warriors with Spear
2x Orc with Two-Handed Weapon
 |
| Spread out: The Witch King in the North, Barrow Wight in the East and Tainted in the West. Perfect! |
The Witch King clearly took great offence to this, as he threw a whopping 4 dice on a Channelled Black Dart, which I decided to throw all three remaining Will on the Barrow Wight to resist and maintain my own Terror rather than take the potential D3 wounds. Luckily I rolled the 5 needed to keep him around, as the Lord of the Nazgul slid behind a building.
Meanwhile, my southern warband began to spread out, taking control of two of the potential objectives, whilst the Wild Warg ran towards one in the middle of the board to remove it from the potential options. Liam, realising that he would likely be losing an entire warband eventually and with only a couple objectives tentatively in his grasp started to attempt to pick them up in the hopes of revealing the Heirloom and winning as his army deteriorated.
 |
| Liam's Barrow Wight and Orcs were well and truly being destroyed |
Luckily in the two attempts at doing so he was unsuccessful, and while he thought the Witch King was safe, a well-placed Compel brought him just into range of the still unused Barrow Wight from the South. Using three dice, I got the deadly 6, and watched Liam begin to pick up dice. Sap Fortitude was on full display though, making a 3 dice resist cost a massive 6 will, and even with 3 dice, a reroll and a Might point remaining, the Witch King simply couldn’t stop himself from succumbing to it!
Funnily enough, the Witch King proceeded to copy the last Witch King I faced, rolling the 6/4+ to wound himself, before being unable to save it with the one roll of Fate (Again, two being stolen by the Dwimmerlaik). Obviously massively unlucky on Liam’s part but having sunk 8 of the Dwimmerlaik’s 16 Will into the entire manoeuvre and 3 of the Barrow Wight’s, I was happy to see it had paid off.
 |
| Dealing with the last dregs of resistance |
 |
| Technically, the forces of Angmar were always going to win |
From here it was more of a formality than anything, as the Heirloom was finally uncovered and that Orc, the banner and Dwimmerlaik ensured they were out of sight of the Tainted to prevent a cheeky Black Dart, even going as far as to get them to lie down behind a wall (sorry Liam!).With the Tainted away from his troops and his forces broken it wasn’t long until his Orcs began to flee in droves, ending the game via quartering.
Overall my rolling (particularly concerning the Witch King) was extremely lucky, but I think given the misfortune Liam’s Barrow Wight had at the beginning of the game it would have still taken a lot for me to give up the advantage. Just as easily my warbands could have been deployed all around the table at the whim of the opposing wraiths to pick apart, but fortunately it wasn’t the case.
MVP: Dwimmerlaik. Still hard to pick one since everyone did their job. Paralyses went off and the Orcs killed off their counterparts. Ultimately stealing that many resources in the one game and just rolling unnaturally well made me give him the honours.
12-0 WIN (Heirloom held, Banner alive and opponent no banner, Leader killed, Enemy broken and unbroken)
With that I had gone unbeaten on Day One, also giving me one of the top seeds going into Day 2, so I would be facing someone that finished second in their own group. Overall I was actually quite surprised to do so well considering the missions for Day One, so I was very keen to see who I would be facing and how far we could go into the Knockout Stages! The social night afterwards was good fun, with plenty of drinks, food and general chats about the hobby to be had.
David had brought a reasonably standard Rivendell list, with Gil-Galad leading a warband of Kings Guard and a pair of Knights. Far more unusually though he had brought along a lone Stormcaller- who is often considered somewhat of a suboptimal choice. Funnily enough against my list I was somewhat wary of it, particularly with the ability to give Gil-Galad additional Will to withstand the incoming magical barrage which would be looking to lock him down as early as possible. Furthermore, his signature Call Winds may be able to move my banner or Barrow Wights away from the lines, meaning I would lose valuable rerolls, my terror bubble or even just the range to target the Elven King.
Saying that, with approximately double his troops I assumed I would be able to eventually overwhelm his small warband whilst still screening off Gil-Galad from anything valuable until he could be taken down and the supplies destroyed.
David deployed first, with the Stormcaller and Gil-Galad’s warband of troops between his middle and right supply, with Gil-Galad himself and the pair of Rivendell Knights centrally, ready to go where needed. I deployed quite standardly, with my forces slightly to the left to match David’s position, but still covering a lot of board space. With a massive river bisecting the board, I assumed David would try to choose a choke point for the infantry to fight in whilst his cavalry took advantage of the shallow water to eventually swing into an exposed flank.
David's List
Rivendell
Gil-Galad, High King of the Elves with Horse and Shield
2x Rivendell Knights with Shield
10x King's Guard with Spear and Shield
1x King's Guard with Spear, Shield and Banner
High Elf Stormcaller
 |
| The board was set |
When the lines finally clashed on the left it was surprisingly the Orcs who took the early lead, as the Barrow Wight on that side spent 2 Will to Paralyse the opposing banner. With many of the Orcs in the frontline wielding axes they were able to eventually pierce a hole in the lines, especially as their superior numbers began to wrap around through the woods and river on either side. Meanwhile, a single Elven warrior was sent off to waylay the Wild Warg hugging the board edge on that side. Gil-Galad and his two knights remained largely hidden, taking some pop shots where available before finally making a move towards the river to threaten the large warband where the lines were clashing.
Finally, this meant I would finally be able to attempt to paralyse Gil-Galad. With 3 dice used for a Compel the Elven King was brought close enough, and another 2 dice was used for a Paralyse, but only to roll a 3 high. Despite this there were plenty of Orcs that had begun to make their way over from the right to form a screen to make it impossible for Gil-Galad to get into Dwimmerlaik even with a Heroic Combat. Against the single Orc that managed to charge him, Gil-Galad then managed to lose the fight, and only narrowly avoided losing his horse!
Luckily I won priority on the next turn, with David electing not to spend Might on a Heroic Move, likely saving it to prevent being paralysed or making a late push. Again, the Dwimmerlaik was nearby to delay Gil-Galad, using a Transfix to keep him in place so that the Barrow Wight deployed on my right could make his way over and attempt to Paralyse him again.
Unfortunately for David the fight between our forces on the left was certainly not in his favour, especially without his banner to help his warriors win the fights. As Elves began to fall the superior numbers of the Orcs began to push around the sides and seriously threaten the supplies directly behind.
Finally, with a second priority in a row and no Heroic Move being called, the second Barrow Wight was in position to finally try and put an end to Gil-Galad for good! With the Dwimmerlaik having properly positioned himself the turn before the Barrow Wight cast on 3 dice and got the much needed 6, which David was unable to resist!
On the other hand the Stormcaller opposing me was struggling to access the powers of nature, failing to cast anything on the incoming Barrow Wight and Orcs. With the Elves on the left going down at much the same rate as the Orcs it meant that there was quickly very few good models to contend with the many Orcs who still remained.
Whilst this was occurring, the lone warband on the right had now split, with half pushing through to contest the back supplies against the last defenders and Knights of Rivendell. Those that stayed behind attempted to strike down Gil-Galad whilst he couldn't fight back, but were only successful in dealing a single wound.
When Gil-Galad finally rolled the natural 6 to reawaken two turns later things looked very different for his army, with the banner killed and only a handful of troops left, whilst the Orcs had well and truly broken through and were positioned to take out all of their enemies supplies in the next turn.
 |
| The Elven Warband was eventually overrun by the superior numbers of their enemies |
 |
| All objectives destroyed by the end |
 |
| Gil-Galad within touching distance of an objective and a Will-less Barrow Wight |
Thus, on the final turn there was nothing to stop the Orcs destroying all three objectives having killed off the final defenders, thus ending the game and bringing home a massive win for the forces of evil against a frighteningly formidable opponent.
Unfortunately for David between the scenario and my army being such a hard counter to those single large heroes it was going to be an uphill battle, and the dice didn’t do him any favours either. Despite this he was (as always) a brilliant opponent throughout and can't wait for our next showdown.
11-0 WIN (3 Supplies destroyed, Enemy broken, unbroken, enemy leader wounded, Banner alive, no enemy banner)
With a win secured it was on to the semi-finals against Theodore. Theodore and I had both played doubles together at Minimize last year (accidentally, whoops!) and fought each other before, with a super tightly fought and low scoring contest going to me last time, and Theodore was sure to remind me of his desire for revenge going into the game!
With Suladan, Dalamyr and a Bo’sun, Theodore was bringing some of the deadliest shooting and combat oriented forces, with plenty of ways to bring in +1 to wound and with a mighty 6” banner to help along his Fight 4 troops. I still held a numbers advantage of about 10, so was looking to simply push up and hold the enemy in their half for as long as possible. If the battle went against me hopefully Theodore wouldn’t have too much time to go and capture my own objectives as I fell back with some Terror still floating around.
3x Corsair Arbalesters
2x Black Numenoreans
Corsair Bo 'sun with Shield
2x Corsairs of Umbar with Shield and Spear
3x Corsair Reavers
3x Corsair Arbalesters
1x Black Numenorean
As expected, whilst I deployed right up on the middle line, Theodore prepared to make best use of his crossbows and throwing weapons from within his own quarter. There was actually not much movement in the first two turns apart from the simple advancement of the Orcs and some sneaky Serpent Riders with Suladan attempting a flank on my right. Yet after attempting a few Fell Lights on the Serpent Riders Theodore pulled back the riders and Suladan, hoping to keep them safe for later use.
 |
| Ready to go at it! |
Although there was an obvious kill box set up for my orcs to push into, I knew as long as I could bait in the big heroes with an appetising charge I could then just overwhelm with my Magic. As the lines clashed for the first time the Orcs took some solid casualties as the Bo 'sun released his Reavers into the fray. Meanwhile, the Arbalesters perched overhead wounded the Dwimmerlaik, forcing him to spend a Fate to shrug it off. The few Corsairs separating my Orcs from Theodore’s two big heroes were killed though, giving them the option to charge in on what appeared to be a vulnerable area, with the Dwimmerlaik and second Barrow Wight not too close.
 |
| Whilst the Orcs advanced, the Corsairs retreated |
 |
| The unluckily paralysed heroes of the Fallen Realms |
Unfortunately it was no less bloody a Shoot phase, as Orcs were felled by the daggers of their adversaries. The three unoccupied Arbalesters from above had a clear line of sight at the Dwimmerlaik due to his direct move towards the other heroes. With two shots hitting him directly, it would take 6s to wound; and it was indeed double 6s that were rolled and the Dwimmerlaik was unceremoniously removed from the board for the first time!
 |
| The Arbalesters look down, having killed the Wraith |
Thankfully though it was a worthy sacrifice, as the paralysed Dalamyr was immediately killed in the same turn, whilst Suladan took 2 wounds and remained down. Elsewhere a Serpent Rider who was attempting to remain on the flank finally failed his courage test and was tempted into my lines and quickly overcome by a Spectre and his allies.
Over the next two turns Suladan was finally killed, but the remaining Corsairs continued to pick up more kills than their losses. However, this rate wasn’t fast enough to overcome the numbers disparity, as those Orcs who had been killing off Theodore’s heroes began rotating over to the left to prevent any Corsairs pushing through onto the middle objectives or reclaiming their own back objective.
 |
| Consolidating the position and staving off the last few Corsairs |
Fortunately when it came time for the Corsairs to begin doing Break tests (with my army not too far from breaking either), it was bad news for the pirates and their Bo 'sun was the first to go, and far from the last! More than 25% of his total force fled, even without Harbinger of Evil active, thereby ending the game that turn and giving me a comprehensive victory!
Although the kill on the Dwimmerlaik was statistically quite lucky, Theodore really did play it as best as he could, but losing your two big heroes so early and with the dice not doing so well was always going to be tough. Realistically though his own forces were also just failing to wound at the necessary rate, even when having +1 or even +2 to wound. Nevertheless, this put me in the final, just a game away from winning the whole thing!
I won the roll off for table edge and luckily took the side with a large defensible barrier to prevent Anthony’s archers being able to use it themselves to likely great effect. Deciding to place down the Dwimmerlaik opposite the ford ahead of him, I was pleased to see Anthony put down his forces opposite mine instead of potentially holing up in a large ruin on the opposite side. With all our forces deployed, it was time to play for everything!
Being severely outmatched in the shooting department, I immediately made for the river crossing, with the Wargs spreading out to hopefully draw some attention from some bows or even troops. Meanwhile, Anthony’s archers were positioned in two small firing groups on either side of his force, which largely advanced to meet me at the river so that his Fight 4 troops would be exposed to as little of my army at a time and thus gain an advantage.
 |
| The Army of Lake-town |
 |
| The orcs opposing them |
 |
| Lines about to clash! |
I managed to mostly cross the river just before the lines were due to clash, and an opportunity presented itself. I was always wary of Braga staying alive too long and continuously calling free Heroic Moves which the Dwimmerlaik couldn’t affect. So when he swung around with a couple models to prepare to charge into the flank, I had already thrown a Drain Courage at him in order to allow me to more freely move him around with the Spectres.
Luckily enough, he ended up failing a courage test and thus I sent him into the river nearby, where he was instantly paralysed (with Sap Fortitude being extremely effective) and taken out by 4 Orcs! On the same turn the Wargs sent into the flanks were met by 3 warriors each, and each came out with a kill on the foolhardy men!
The next turn was just as brutal, as now the men of Lake-town attempted to charge in wherever they could through the poor courage and Terror of the Orcs, accompanied by their leader Dwalin. With the Master using one of his 6 Might to take his soldiers to Fight 4, the men of Lake-town were surprisingly efficient, winning fights whilst outnumbered and picking up some kills against their piercing opponents.
Yet, these were ultimately losses as I was willing to take, as Dwalin suffered a fate similar to Braga as he ultimately failed to roll the necessary 5 to resist and was torn to shreds. Although this meant points in the bag already for killing his Leader, I was hyper aware of the threat of the many Fight 4 troops so needed to stay wary.
 |
| The heroes of Lake-town were engaged, and eventually killed |
As the Wargs on the flank were either killed or held up (killing two warriors each, what a win!), the numbers of Laketown now began to fully come to bear. Many courage tests were passed to charge, and those who didn’t were able to freely shoot into my spear supports.
Overall the next few turns were quite similar, as either way I would try and outnumber 4v2 in all combats, and the men of Lake-town would try their best to level the numbers after passing their courage tests. Additionally the Dwimmerlaik and Master of Lake-town were in a game of chicken, where the Master would try to pick the turns where the most combats were taking place to activate his rule and the Dwimmerlaik would try and prevent it with a Transfix.
Slowly yet surely we both began losing models and getting closer and closer to breaking, with the Orcs only needing to lose 5 more to do so whilst the men of Laketown needed 11. Yet, with a Hail Mary combo the Dwimmerlaik’s Compel and Barrow Wight’s Paralyse were able to coax out the Master and put him down for a time and stop the banner effect. Although I wouldn’t be able to get my hands on him it meant no need to spend Will each turn to prevent him having an impact.
With a tactical retreat back into the river to reform the lines and the use of the spectres to bring random soldiers to their death. Accompanied by some severely poor rolls on Anthony’s behalf and I managed to break his force whilst mine only took 3! With Alfrid turning tail and running, the warriors of Laketown under the shadow of the Dwimmerlaik’s Harbinger of Evil also ran without a Stand Fast present. Quickly, their forces were quartered, and the game ended, giving me a surprisingly decisive win and 1st place overall!
 |
| The much-needed retreat to reform the lines and prevent myself breaking. |
MVP: Barrow Wights. Paralysed who needed to be, gave the Terror to hold the line, got kills when needed. Couldn’t ask for more.
12-0 WIN (Leader killed, enemy broken, unbroken, banner alive, no enemy banner, enemy quartered)
Post-Event List Thoughts
When I made this list, I suspected that it would have some nasty tricks, but never in a million years did I think it would be capable of going this far and taking on so many different lists, particularly at a tournament where I didn’t have the veto system in my favour. Hopefully I’ve shone some light on models such as the Dwimmerlaik, who I can imagine being taken in a number of other resource-focussed lists, even in the Mordor army list.After some experimentation of the list at 650 points (both with a Shade and a 0 Might Witch King), I think I’ll be putting these guys onto the shelf for a little while. Although the basics of the list still hold true, it’s at 650 that opponents now have far more ways of dealing with Terror and Magic, as well as having more threats than the Barrow Wight’s can deal with with only 10 Will. Additionally I'm not one to use the same list often so even though they've gotten me my second tournament win ever, they'll be retiring on the shelf for a little while.
I’ll be heading out to Geelong next for some fun theme-y madness, so keep your eyes peeled for the next one, and thanks for reading!
Great review - that Black Gate list, I assume, has a subset of models with shields also having spears? 18-20 model warbands don't seem right to me. :P Angmar hordes at low points levels can be a nightmare to face, especially if you don't auto-pass Courage tests. Having 2 Barrow-Wights and a wraith for harbinger is a nasty combo as well. Congrats on the win!
ReplyDeleteYeah must be a small typo on my part haha. Yeah the Terror really is the killer, especially when I already have so many models on the board to take apart whoever is able to charge me. Just glad I was able to prove the concept that it's good enough to account for the lack of control via Might. Thanks for giving it a read!
Delete